Thursday, January 31, 2013

Stripes and Pink

Gap striped luxe jersey ringer T, raspberry always skinny cords, and polka dot flats;
VellePurse green pouch; Kate Spade scallop hoop earrings

Hi, friends! First off, thanks so much for your excitement about our big announcement! I'll try to spread out the pregnancy- and baby-related posts, but no guarantees :)

Since it's Friday and Friday usually means a little fashion, I thought I would share one of my favorite articles of maternity clothing with you, excluding leggings. I didn't owned a pair of leggings until now and can't believe what I've been missing!

 
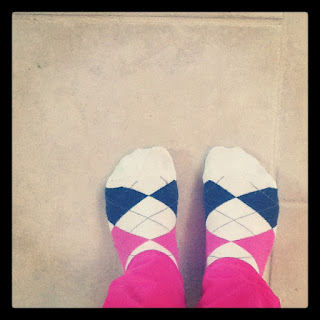
We'll talk about the slippery slope of leggings some other time. Today, I'm talking about bright pink skinny cords! I wear them about once a week and looooove them! I pair them with almost everything: sparkle TOMS, boots, sneakers, striped tops, solid tops, and whatever else will fit from my wardrobe.
 
 
The above picture was snapped the morning of the 20 week ultrasound. The one where we found out our baby Lentil is a baby girl! In defense of my seemingly girly outfit, I was also wearing a navy and white striped top. Which is another thing, I can't.quit.stripes! Some pregnant ladies crave pickles and ice cream. Apparently I crave striped maternity clothes :)
 
One more thing. This post wasn't sponsored by Gap Preggo Maternity, but I have some mad love for them right now. About 90% of my maternity clothes are from there: jeans, work pants, leggings, shirts, one sweater, you name it. As I've hinted previously, I really like trying on clothes before I buy them. And The Gap fits me right.
 
I'd probably be fine with ordering from The G-A-P online, but this new world that includes an ever-expanding belly makes shopping particularly interesting. I did take a risk and ordered a maternity dress from an online retailer (who shall not be named). The dress showed up after the wedding I was attending and fit horribly. Not a good combination for a pregnant lady.
 
Any mommas or mommas-to-be want to share where they found stylish and affordable maternity clothes?
 
For everyone else, have a fantastic weekend!
 

Pin It

Spilling the Lentil Beans


John and I are excited to announce that we're expecting a baby girl in May! As you might guess from the picture, she's currently the length of a spaghetti squash and 22 weeks along! That puts her around 11 inches from head to foot and weighing about a pound. 11 inches is a sheet of paper, which is just mind-boggling!

The spaghetti squash I'm holding is from our garden from this summer and we ate it in Lentil's honor last night.


We've lovingly nicknamed our baby girl Lentil since she was once the size of a lentil bean. Even though she's grown into the size of a lime, avocado, bell pepper, and beyond, the nickname "Lentil" stuck. As a foodie, I get a kick out of the weekly fruit and veggie comparisons in the BabyCenter emails.

Gingerbread mommy baked for Christmas

I realize that 22 weeks is quite a wait to be sharing our news with the Internets. But we wanted to tell family and friends in person or on the phone before they found out via Facebook or some other form of social media. We didn't start telling our immediate families and my extended family until I was in my second trimester, which around Thanksgiving. I miscarried at 6 weeks back in June [he or she had an estimated due date of last week], so we wanted to be sure the risk of miscarriage was lower before spreading the good news. Since we spent Christmas in Chicago with John's family, we waited until then to tell his extended family.

However, there was one family member John shared the news with very early on: his grandmother. She passed away in early September 2012 and John was able to say his final goodbyes a few days beforehand when he had a moment alone with her. She wasn't able to speak, but was still able to respond in a non-verbal way. He talked about the Chicago Bears (one of her favorite things) and she responded positively. He then told her that I might be pregnant and she had a very strong response.

There's a similar story with my family. The day that my grandfather passed away was the day my Mom found out she was pregnant with my younger sister. Things definitely happen for a reason and I believe that God's timing is perfect.

We're so grateful for the love and support we've received in our big announcement and are extremely thankful for the baby girl growing inside of me. I can't wait to share more of this journey with you!

Pin It

Monday, January 28, 2013

2013 Super Bowl Desserts


It's that time of year again: the Super Bowl is upon us! With the commercials and a Beyonce halftime show, this year's event should make for an entertaining evening. In keeping with my personal tradition, I'll be baking some desserts to represent the teams. 

To be frank, when I heard that Baltimore made it to the Super Bowl, I was less than excited. While I'm not a huge football fan, I grew up in Cleveland and the infamous Art Modell moved the Cleveland Browns to Baltimore for the 1996 football season. That left our fair city without a football team until 1999. To say that Cleveland is still bitter is an understatement. At least we got to keep our team name, colors, team records, etc. Needless to say, I'll be cheering for San Francisco this Sunday.

Top left: Fortune cookie recipe from Martha Stewart
Top right: Gold dipped fortune cookies from Cake Appreciation Society
Bottom: Dipped and sprinkled fortune cookies from Share Dessert Company

To get back to the desserts, when I heard that San Francisco would be playing, two desserts came to mind immediately: fortune cookies and chocolate. My family visited San Francisco several years ago and we stopped by a fortune cookie factory. According to the NY Times (and Wikipedia), fortune cookies were "introduced by the Japanese, popularized by the Chinese, but ultimately ... consumed by Americans." You could go the Martha Stewart route and bake fortune cookies from scratch. Or you could go the easy route and decorate store-bought fortune cookies with edible glitter or team-colored sprinkles.


As for the chocolate, Ghirardelli is an obvious choice. Bake anything with Ghirardelli and you're golden. Maybe dip some fortune cookies in Ghirardelli chocolate!

Top left: Berger cookie recipe from Blue-Eyed Bakers
Top right and bottom: Berger cookie feature in The Washington Post

Another reason I was hesitant for Baltimore to make it to the Super Bowl is that I didn't know if they had a signature dessert. Seafood: yes. Dessert: I was hoping it wasn't a Maryland crab cupcake. Fortunately, Baltimore is home to the decadent Berger Cookie. It's a vanilla cookie dunked in chocolate ganache. DUNKED!

So my Noodles started thinking, what if this year I combined the cities into one dessert? Bake the uber-delicious Berger cookie and dunk it in a ganache made with Ghirardelli chocolate? Sounds like the perfect game plan to me!

Don't forget to wash down your Super Bowl treats with a little craft beer! San Francisco has all sorts of good beer to enjoy. Anchor Brewing and Lagunitas should be pretty accessible. While there are microbrews available in the Baltimore area, I'm going to suggest Flying Dog. They're in Maryland and an hour outside of Baltimore. Plus, their labels are pretty entertaining.

What are you bringing to this year's Super Bowl party?
Pin It

Thursday, January 24, 2013

Black and White and a Pinch of Color

J. Crew pearl stud earrings, knot bracelet, Martina suede wedgespolka dot blouse, leopard belt;
Gap Perfect trousers; Old Navy scarf; Brahmin Tucker satchel bag

Hi, friends! Thanks for your love on my ottoman reveal. Though the next time I put together a tutorial, can someone remind me to start drafting the post as I go?

While it's casual Friday at work, I was inspired to create a business casual outfit I might wear during the earlier part of the week. {av} suggested putting together a black and white outfit, but I couldn't help but add a bit more color. I guess that's my signature style: classic [the black + white] with a twist [a bit of bright colors and/or patterns].

And while we're at it, scarves are also my "thing." That Old Navy scarf practically has my name on it with the pink, stripes, and polka dots! It's only $13 full-price, but at less than $10 with a 25% off online code (MYSTERY through January 27, 2013), that baby might be coming home with me.

What's your signature style?


Pin It

Wednesday, January 23, 2013

Building an Upholstered Ottoman


In what can be described as a labor of love, here's our new upholstered ottoman for the back room! I started this puppy in October 2012 and finally finished it in January 2013. Sure I got side-tracked and a little intimidated during the process, but it's finally done! This tutorial on Design*Sponge was helpful, but I also figured things out as I went.

Without further ado, hope you're ready for a detailed and photo-heavy post documenting how to build your own upholstered ottoman.

Embedded image permalink

Materials:
  • 3/4 in. plywood/MDF:
    • 2 cuts for the top/bottom - 45" x 19"
    • 2 cuts for the length - 45" x 8.5"
    • 2 cuts for the width - 17.5" x 8.5"
  • Wood glue (Liquid Nails)
  • 1 1/2" wood/masonry screws
  • 2 inch thick foam, cut to 45" x 19"
  • Spray adhesive (I just used the wood glue)
  • Extra loft batting (I bought batting for a twin-sized quilt (72" x 90") at Joann's and had plenty)
  • 5/16" staples
  • 2 to 3 yards of fabric, depending on the pattern repeat (I bought ours from Premier Prints)
  • Matching thread
  • 4 - 2" legs
  • Wood stain (I used Mixwax wiping stain/finish in walnut)
  • Clean rag or socks
  • 4 screw-on leg plates
  • Nailhead trim (6 packs of 25 nails)
  • Scotchguard

Tools:
  • Table saw (unnecessary if your wood is cut at the hardware store)
  • Drill and drill bit
  • Clamps (optional)
  • Serrated bread knife, electric carving knife, or hand saw (if you need to cut the foam to size)
  • Scissors
  • Staple gun (I bought the Stanley TR250)
  • Sewing machine
  • Screwdriver
  • Measuring tape
  • Pencil
  • Hammer wrapped with duct tape
  • Pliers

Building a Box


Once your wood is cut to size, you'll want to double check that the sides andcorners all match up and are at a right angle. If necessary, sand down any uneven edges.


Once you're satisfied that everything matches up, it's time to screw the sides of the box together (the 45" x 8.5" and 17.5" x 8.5" cuts). Give the edges of the wood a good swipe of Liquid Nails. Clamp the sides of the box together and screw together the sides. Since we don't have large clamps, I held the sides of the box while John screwed them together.


Once the sides are screwed together, apply Liquid Nails to the top of the box. Screw the 45" x 19" piece of wood to the top.

Flip this over and repeat with the 45" x 19" piece of wood for the bottom.

Embedded image permalink

You should be left with a box that looks something like this. I let the box "set" for a few days before starting on the upholstery.

Upholstering the Box


First, we tackled the foam. Joann's was able to cut the 2" foam to my required length (45"), but I needed to trim it to the proper width (19").
 

I used a small handsaw for the task. Joann's used an electric carving knife (what you would use for a Thanksgiving turkey), but a serrated bread knife would also work.


Spray the top of the box with the adhesive (or use the Liquid Nails). Really cover the surface!


Press the foam into the glue/adhesive. I let things set for a day or so again.


Once the glue is set, it's time for the batting. You could mark our your measurements on the batting and cut. Since I had such a large piece of batting, I simply draped it over the box and started cutting it to size.


Snip, snip, snip.


I draped the batting over the box in the opposite direction and cut it again. The pieces of batting overlap on the top.


And now for my upholstery weapon of choice: the staple gun. This one was around $20. I picked it because it's versatile (we can use staples or brads) and "features an easy-to-squeeze trigger and comfortable handle to reduce hand fatigue." This is the first time I used a staple gun, so can't really compare it to anything else. Overall, it seems like a good pick.


Flip the box over so the foam is on the floor. Pull the batting evenly over the sides of the box and staple every few inches. Be sure to avoid stapling on the screws.


Like so!


This is how things looked from the bottom. You'll see in future pictures that we trimmed around the corners where the screw-on leg plates were installed.


This is how the upholstered box looked once flipped foam-side up.


A close-up of a corner. The part hanging out at the bottom was eventually tucked under or trimmed.


Probably the hardest part of this whole project was picking the fabric and lining up the pattern. I bought 2 yards of fabric, but life would have been so much easier if I had purchased 3 yards. The pattern repeat made things a little tight and the pattern didn't line up perfectly. Close, but not perfect.


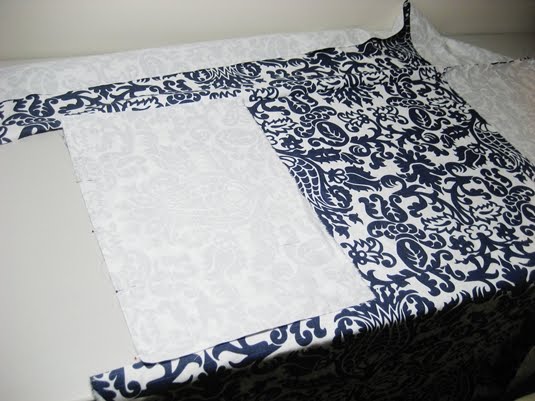
In essence, I made a slipcover that I then stapled to the padded box. Take the dimensions of the upholstered box (45" x 19" x 12") and add a few inches along each side for the seam allowance and for when you staple the fabric to the box. I also recommend working on one side at a time, checking the fit of your "slipcover" as you go.


First, I cut the fabric for the top ~46" x 20". This allows for a 1/2" seam allowance on each side. Then I cut 2 pieces of fabric for the length ~46" x 15". This takes into account a 1/2" seam allowance on the long side and the 1/2" seam allowance and room to staple the fabric on the short side. Sew one of the "length" pieces to the "top" piece.

I then cut the two side pieces ~20" x 15". This accounts for both a 1/2" seam allowance on the long side and 1/2" seam allowance and staple room on the short side. Sew one of the "side" pieces to the "top" piece. Then sew the "side" piece to the "length" piece. You've now created one of the corners of the "slipcover."


Continue to work your way around the slipcover. Sewing the "length" to the "top" and then sewing a corner.


Sew the final "side" to the "top" and then sew the corners.


Don't forget to check the fit of your "slipcover" as you go. You want to make sure it's nice and snug on the padded box.


Once you're satisfied with your fit (and yes, I had to rip a few seams and start over), it's time to staple again! With the "slipcover" on, flip the box over so it's foam-side down.


Pull the fabric tightly and evenly and start stapling to the bottom of the box. I held the fabric tight while John stapled. We started from the center of the fabric and worked our way out. We also alternated the sides that we stapled to make sure the fabric was pulled evently.


Fold over the fabric at the corners and staple. Be sure to avoid the screws and any staples used to attach the batting.

The Legs


We picked up four unfinished wood legs from the Home Depot. Right near the legs were these screw-on leg plates (they came with screws). We simply screwed the plates onto the bottom of our ottoman and the legs screw into the plate.


As we were screwing on the plates, we noticed that the batting was getting in the way. Therefore, we trimmed it where the plates would be installed. We also made sure to space the plates evenly from the edge of the corners.


Yes, we ultimately chose a different set of legs. The first set we bought were 6" long, which made the ottoman a little too tall. But this picture shows how the leg and plate set-up works.


These are the legs we decided on. 2" high and unfinished. We picked up the Minwax water based wipe-on stain in walnut.


It was easy to apply with a clean and soon-to-be-retired sock.


Simply squirt a little stain on the leg and wipe on. Wipe off any excess.


This is how things were looking after one coat.


We let the legs dry for the requisite hour and then wiped on a second coat. We let the legs dry for another day or so before screwing them onto the ottoman.

The Nailhead Trim


I could have stopped once we added the stained legs, but I thought the ottoman needed a little finishing trim. Therefore, I picked up some bronze nailhead trim from Ace Hardware.


I used our small tap hammer and the guy at Ace suggested taping the end with duct tape. That padded the hammer and prevented scratches on the nailhead. The pliers and wrench were on hand to pull out any nails that didn't cooperate.


I marked a spot every inch with a pencil. The distance from the edge of the ottoman to the nailhead was simply the width of my tape measure (so about an inch).

The Finished Ottoman!


Here's our upholstered ottoman in all of its shining glory!


Of course, my feet are resting on the ottoman as I finish up this post. I still have to spray the fabric with Scotchguard, so hopefully I can take care of that over the next few days.


And yes, watching cable TV hasn't been the same now that we have somewhere to kick up our feet :)

Pin It
Related Posts Plugin for WordPress, Blogger...