Friday, March 29, 2013

A Girly Easter

J. Crew pearl studs; Gift Shop Brooklyn gold and floral clutch; J. Crew sandals;
Altar'd State pleated maxi dress;
Old Navy baby hat, dress, and shoes

Can you believe that Easter is this weekend? I can't. Especially since Easter is the last "big" holiday before the arrival of our baby girl. Next year we'll be putting together an Easter basket for her and possibly having an Easter egg hunt! The thought of that (and all the cuteness) just blows my mind.

As for that dress, I don't know if it could accommodate my bump. Though I did discover it through a maternity shoot on 100 Layer Cakelet, the family blog related to the popular wedding blog 100 Layer Cake.

And since it's getting harder and harder to resist the sweet siren song of baby girl clothes with their ruffles and pink, I had to include a coordinating dress for our little mini. Though I'll try not to put us in matching outfits once she's actually here ;)

Hope you have a happy and blessed Easter!


Pin It

Thursday, March 28, 2013

DIY Lace Embellished Top


I don't know about you, but when it comes to complex DIY projects, especially ones that I think will be simple, my creative process looks a little something like this:
  1. Find inspiration
  2. Do a quick search on Google and Pinterest. The project seems so easy! Why didn't somebody already come up with this project?
  3. Brainstorm instructions.
  4. Start sourcing my supplies. Be sure to over-analyze every option.
  5. Pull together all of my supplies and tools.
  6. Start project.
  7. Realize what makes sense in my head isn't the best option in real-life. Especially if I want to do it the right way vs. the easy way.
  8. Push aside project in frustration.
  9. Complain that I don't know what I'm doing.
  10. Look for instructions and tips again.
  11. Repeat Steps 6 through 10, as necessary.
  12. Resolve to finish the project and start plowing through it.
  13. Finish the project.
  14. Bask in the glory of being done.
  15. Vow to take on realistic projects in the future.
  16. Find new inspiration and start the cycle all over again.
It's a little bit like the book "If You Give a Mouse a Cookie."

And so it went with this lace top. When I first started out, I thought I would simply use fabric glue to add some lace to the shoulder/chest area of a boring maternity shirt. Then I decided it would be fun to modify the sleeves. Well, guess what? I've only sewn two articles of clothing: a dress for a friend's baby and a maxi dress for myself. Neither had sleeves. I didn't have a pattern, so there was a lot of trial and error involved. I'd pin the sleeves, try on the shirt, and feel like a linebacker. Eventually, I settled on a design I liked after using the back of a chair as a dress form.

When it came to attaching the lace to the body of the shirt, I hemmed and hawed. I called my mom since she sewed her clothes while growing up. I stared at my shirt and inspiration shirts. And probably said a few choice words. Using fabric glue didn't feel "finished" enough and I was worried about the lace fraying. I sure as heck didn't want to rip the entire shirt apart, so I wound up folding under the lace and stiching it to the shirt.

Overall, I love the way the shirt turned out. Now that I figured it out, I may or may not make another. Part of my love of DIY is learning a new skill.


DIY Lace Embellished Top
Note: I'm going to put it out there that this is more of an intermediate project. If you know your way around a sewing maching and have sewn clothes before, this project shouldn't be as hard for you.

Supplies
T-shirt (I bought this Gap maternity T-shirt in gray on sale)
Lace (I bought one yard of this 8" wide eyelash lace)
Seam ripper
Pins
Thread to match your T-shirt and lace
Needle
Sewing machine
Scissors

Patience (optional)


Directions
1. Pre-wash your shirt. This will help avoid shrinkage later.

2. Lay your shirt flat on the table and measure how much lace you'll need to cover the body/shoulder area of the shirt. I gave myself about 14 inches. Cut that much from the yard of lace. Cut the remaining piece in two. The two smaller pieces will be used for the sleeves.


3. Turn the shirt inside-out and rip the seams at the armholes, removing the sleeves.


4. With the shirt still turned inside-out, fold over ~1/4 inch of fabric from the edge of the armhole (1/4 inch seam allowance), and iron so the wrong sides of the fabric are touching each other. This will ultimately give the armholes a finished look.


5. With the shirt draped over the back of a chair (or on a dress form) start to position and pin your lace into a sleeve. Your shirt will still be inside-out. The right side of the lace will be pinned to the wrong side of shirt.

This took lots of trial and error for me. I would pin the lace, try on the shirt, and make adjustments, as needed.


6. Ultimately, I figured that finding the middle of the piece of lace (so 5.5 inches in if my lace was 11 inches long), pinching the lace together just a little bit, and pinning the pinched piece to the top seam was the best. Then I draped the lace down over the armholes and pinned away.


7. Baste the lace to the body of the shirt. Basting is long easily removable stitches. You can do this by hand or using a sewing machine. I just used a needle and thread. These long and loose stitches temporarily hold the lace to the shirt. You'll remove them later once the lace is permanently sewn to the shirt.

8. Try on your shirt once more to make sure you like the shape and size of the lace sleeves.

9. I you don't like how the sleeves look, you can easily remove the basting stitches and reposition the lace.


10. With the shirt now turned right-side out (the right-side of the lace will also be facing out), sew the lace sleeves to the body of the shirt. The stitch will be very close to the edge of the armhole (I kept the sewing machine presser foot even with the edge of the armhole) since you only have 1/4 inch seam allowance.

You can remove the basting stitches at this point.


You can see how closely I stitched to the edge of the armhole.


How one sleeve looks! It's hard to tell, but the lace doesn't go all the way around the armhole. It's a little more than a cap sleeve, but not quite a full short sleeve.

With both sleeves sewn in place, you could easily stop there. If you want to add lace to the body/shoulders, let's continue on:


11. Iron the body of the shirt. Lay the lace over the body of the shirt.


12. Pin the lace in place and cut the lace so you have a 1/4 inch seem allowance at the armholes, shoulders, and neckhole.


13. I found it really helpful to slide a thin piece of cardboard inside the body of the shirt so that I wasn't pinning the lace to the front and back of the shirt.

Fold the 1/4 inch edge of lace under and pin into place.


14. Sew the lace to the body of the shirt.


15. Turning the shirt inside out, trim the excess lace from the sleeves. You could have also trimmed the excess before adding the lace to the body of the shirt.


16. Turn your shirt right-side out.

Voila! It's time to take your shirt out on the town!

Pin It

Tuesday, March 26, 2013

Tips to Save Money when Buying a Car

Hi, friends! How was your weekend? I had a few vacation days to use up from 2012, so it was a four-day weekend for me. I didn't do anything crazy, mostly errands and catching up on sleep. The highlight of the weekend was building our crib! Which puts us one mini-step closer to being ready!

Another potential item on our to-do list is buying a new (to us) car. My car is getting up there in miles and we're starting to get to our breaking point with repair costs. We haven't had any major work done recently (knock on wood), but would rather not continue to throw money at the car. If anyone else is in the market for a new car, I have a great guest post from Melanie Lewis on ways to save money when buying a car:


When it comes to making major purchases, buying a new or used car ranks right up at the top of the list. In fact, it can seem like too daunting of a task to some people because of the high cost. Luckily, there are several ways to reduce the cost of buying a car.

Buying a vehicle should be a thrilling experience, but it can be difficult to be excited about it considering how much money will be expended. Saving money can take some of the sting out and make it fun again.

Pay cash
The best way to save money will take some advanced planning and time. By saving enough money to buy a vehicle with cash, consumers can save a great deal of money by not paying the interest that comes along with financing through a car loan. In addition, some dealerships may offer special incentives for those that are willing to pay cash. It can also strengthen a customer’s bargaining position since it will show they are serious about the purchase.

Research
Before heading out to any dealerships, take the time to complete a little research. Know what type of vehicle will best suit your needs. If gas mileage is important, look at which ones have the best rates. Those with a good safety record might also be important to note. Making a list of the most desirable vehicles will make it less likely to be swayed by a salesman’s pitch at the dealer.

Shop around
Once the list has been made, it’s time to start shopping around. Go to more than one dealer and compare prices as well as options. This can also include shopping online at websites that collect various offers. Dealers are highly competitive, so don’t be afraid to point out what deals another seller might be offering.

Buy used
While most people dream of buying a new car, purchasing a used vehicle can mean getting a quality car at the fraction of the cost of a new one. A dealership will often still offer a warranty on used vehicles it sells, which takes away some of the risk. Even less expensive would be to search the classified ads of the local newspaper. It should be noted, however, that before buying any car from a private seller that the car should be inspected by an independent mechanic first to make sure it’s not a lemon.

Insurance
When people think about saving money on a car purchase, many think only about the purchase price, but long-term costs associate with the vehicle should also be considered. This includes insurance and fuel costs. Sportier cars will have higher insurance premiums. Look for cars with high gas mileage, which will save on fuel costs.

Saving money can put the joy back into the process of buying a car. There are several ways to accomplish this, and most just require a little patience and planning on the part of the consumer.

Thanks, Melanie! We'll definitely keep these tips in mind as we continue our search for a new car. So far, we've looked at reviews on websites like Kelley Blue Book and Edmunds.com. We also visited a dealer to gather more information and see a few car models in person. We're still deciding whether to get a car or something bigger. Either way, we're mostly likely going to buy something used and pay cash (i.e. the Bohemian credit plan).

This is a guest post from Melanie Lewis. Melanie writes for a site that has information on used car auto loans and offers advice on things to consider before borrowing money to purchase a vehicle.
Pin It

Friday, March 22, 2013

Springing for a Custom Dress

eShakti Colorblock frame print dress, Anthropologie Oleic hoops, Gap neon belt,
Kate Spade Waverly Terrace Jeanetta clutch, Vera Wang Lavender Febe sandals
 
I hear it's Spring, but you wouldn't know it in Chicago. The other morning it was 15*, but it felt like 0*. Ugh. If you're somewhere warm on this Friday, please don't rub it in. Or maybe just wear a colorful and springy outfit like this for me.
 

I hope things start to warm up soon because I have Easter and baby showers to look forward to! And I'm really hoping to wear this gorgeous dress sent to me by eShakti! It's not technically a maternity dress, but the empire waist and pleats easily accommodate my belly.
 
 
Plus, eShakti has the option of letting you send in your measurements and creating a custom-sized dress. Which is perfect because my measurements are currently all over the place. Even if you're not pregnant, it's amazing to put on a dress custom-made for your body. I'd much rather wear a dress that fits well over one that's just OK. Some styles even have the options of customizing the length, sleeves, and neckline.
 
And guess how much it costs to customize a dress, be it measurements or options? $7.50! Some options (like removing pockets) are free. What the what! (Though I love dresses with pockets, so probably wouldn't do that.)
 
eShakti is constantly updating their inventory and it seems like my dress is currently out of stock (here it is in a different shade of blue). Though I would also gladly wear the colorful dress from above and several other of their spring dresses. And brides-to-be will be happy to know that eShakti has a line of bridesmaid dresses and several of their spring dresses will also work as bridesmaid dresses.
 
Hope you have a fantastic weekend! Our crib came during the week, so we'll be putting it together this weekend.
 
 
Note: A custom dress was given to me by eShakti. All thoughts and opinions are my own.

Pin It

Thursday, March 21, 2013

Drinking while Pregnant


Can I share a story with you from when I was secretly pregnant? As I'm sure you know, drinking alcohol while pregnant is a big "no no" and some gals even avoid alcohol while trying to get pregnant. So passing up drinks can be a tip off that someone is pregnant or trying.
 
During the first trimester, I was mostly able to dodge the questions. Yes, I/we may have avoided a few social situations so not to raise suspicions (i.e. skipping a work happy hour). A last minute trip to Milwaukee for John's friend's party? I was the DD since we drove back that night. But one trip and related social activities were completely unavoidable....my friend's wedding in Denver.
 
Leading up to the trip, we brainstormed different reasons that I wasn't drinking since my friends all know I enjoy a good craft beer. We homebrew, for crying out loud! And Denver is a mecca for craft beer!
 
The night before the wedding, we went to dinner at a Mexican restaurant with another couple and I ordered a "margarita." Meaning, I ordered the margarita, sent John to the bathroom, and had him tell the waiter to change the order to a virgin margarita. Disaster averted.
 
But....after dinner, we met up with a larger group of friends for dessert and drinks at The Cheesecake Factory. This time, the plan was to order a Bud Lite, have the waiter dump the beer, and refill the bottle with water. I've heard of coworkers successfully doing that at a happy hour, so it seemed like a good idea. Not this time.
 
Once a table opened up, the hostess walked our group to where we would be seated. As everyone was getting settled, John told the hostess our plan. She then told our waiter.
 
Once seated, the waiter introduced himself and asked everyone what they wanted to drink. Looking at John, he says loud enough for everyone to hear, "HEY! DON'T WORRY, MAN. I GOT YOU COVERED! I'LL GET HER A BOTTLE OF BUD LITE, DUMP OUT THE BEER, AND FILL IT WITH WATER BECAUSE SHE'S PREGNANT AND YOU DON'T WANT ANYONE TO KNOW YET! SOUND GOOD?"
 
I was so shocked at what came out of this high schooler's mouth that I didn't even know how to respond. John was livid on the inside, but managed to calmly and firmly say that he didn't know what this kid was talking about and that he had the wrong table. Unfazed, the waiter responded, "NO, MAN! THE HOSTESS TOLD ME IT WAS YOU!" Of course, everyone ended up ordering coffee or water.
 
Once the waiter left, the couple sitting across from us asked if we had any "big news" to share. Lying through my teeth, I denied the whole thing. Another couple tried to ignore the whole fiasco because she was pregnant and knew what could be going through my head if I was actually pregnant. We tried to pretend like the conversation never happened, but it was hard to forget since our waiter continued to make strange comments throughout the night.
 
At the wedding reception, we tried to keep things simple. John would get me a Sprite and asked the bartender to make it look like a mixed drink. Though pretending to sip wine at the table only lasted for so long. I don't know if we really fooled anyone because as we were saying our "good byes," the couple that asked us if we had anything excited to share at The Cheesecake Factory wished us luck and hoped that we would have some good news soon.
 
Busted.
 
If you take anything away from this embarrassing story, PLEASE DON'T OVER THINK THINGS!!!

 
Now that I have that off of my chest, I'd like to share what I am enjoying these days. Surprisingly, I don't miss beer at all. Though sometimes I'd like a little red wine. I'm usually content with just water or skim milk. If I want to mix things up, my favorite is Goose Island's spicy ginger ale. Who knew there was a wide world of craft sodas?! I've also enjoyed a few varieties of IZZE sparkling juice. Other times, I'll order (or make) a non-alcoholic cocktail. Mojitos without the rum are still pretty tasty. As for non-alcoholic beer, I'm not impressed. We've purchased Bitburger Drive N/A (with 0.0% alcohol) and I've barely touched the stuff.
 
If you've been pregnant, do you have a fool-proof excuse for avoiding alcohol?

Pin It

Tuesday, March 19, 2013

Goodbye, Google Reader


As I'm sure you all know by now, Google Reader is going away this summer (bah!). A quick search will land you a bajillion news stories and blog posts offering alternative RSS feed aggregators. Lisa at elembee offers her suggestions, as well as how to eliminate Internet clutter. By the way, Lisa has a great series called "Blogkeeping" with all sorts of helpful blogging tips.

As a quick reference, here's how you can follow my blog with Bloglovin, Facebook, Twitter, Pinterest, or Instagram.
Pin It

Thursday, March 14, 2013

Inspired by Shamrock Shakes

Madewell chambray shirt, J. Crew Factory mint pencil skirt, Gap dot calf hair ballet flats,
Madewell crystal collage necklace, Gap leather stripe tote

Happy St. Patty's Day weekend! It's been another crazy week at work, so I'm looking forward to a weekend of relaxing and nesting. We ordered our crib (!) this week when we realized it was listed at $20 less than usual. We would have gladly paid full price, but figured we'd jump at the opportunity. All the little costs and savings add up with babies.

To take us into the weekend, I put together an outfit based on a seasonal favorite: the shamrock shake! I may have enjoyed a couple of them over the past few weeks. And while I haven't had any late-night cravings, I found out that the drive-thru at the local McDonald's is open 24 hours. Here's to hoping we won't need to use it ;)

For those looking for a "healthier" or more natural shake, Cupcakes and Cashmere posted a recipe for a homemade shamrock shake this past week. This could be dangerous knowing we could make one any time of the year!

Have you enjoyed a shamrock shake this season?


Pin It

Wednesday, March 13, 2013

The Nesting Instinct is no Joke!

Hey there, Wednesday. How did you get here already? At one of my previous jobs, we joked that you could start asking about upcoming weekend plans once Wednesday rolled around. We don't have anything major planned for this weekend (yet), so please indulge me in prior weekend talk.

Contemplating colors and crib sheets at The Land of Nod

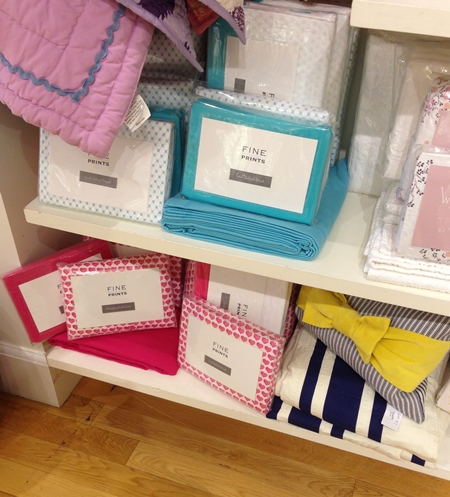
While I had high hopes when writing last Thursday's Friday's Fancies post, my weekend DIY project didn't happen. The urge to nest hit hard and I went on a domestic tirade instead of partaking in some relaxing crafting. After taking the glucose tolerance test on Saturday morning, I spent a few hours looking at nursery decor. There were trips to The Land of Nod and Pottery Barn Kids. And of course the creation of a "sophisticated girly" nursery board on Pinterest.

We took a trip to the city Saturday evening and spent some time with some of the liveliest people we know. And then it was Sunday...

Generally Sunday is a day of rest, but I couldn't resist the urge to clean! John is definitely the neater one out of the two of us, so this was a refreshing change for him. Yes, I usually go on a mini cleaning binge when we're expecting company, but this was more than that. We're going to have a new person living with us!

From the Bucks blog at The New York Times

So I started evicting the clutter from our house. Empty boxes were recycled. Old food and expired sunscreen were thrown in the trash. Documents were shredded. A donation box was filled for Goodwill.

And it felt GOOD!

Babies don't need a lot of stuff to survive, but the stuff accumulates anyways. I figured we might as well start making room for said stuff.

Yes, there's more to do, but I feel like we're making good progress. We also attended a seminar at our parish about what we can do as parents to lead our children toward a vibrant faith and balanced life. Which is much more important than having the perfectly pretty nursery.

Pin It

Thursday, March 7, 2013

A Little Lace

Kate Spade bow earrings, Hive & Honey bracelet, Mlle Bagatelles clutch,
J. Crew Everly suede pumps, Topshop eyelash lace shell, Gap destructed skimmer jeans

Hi, friends! How did your week treat you? It was a jam-packed week at work, so I'm looking forward to a little R&R. And I plan on doing a little crafting as inspired by this week's Friday's Fancies theme: lace. If all goes well, I should have a DIY post to share with you next week.

In baby-related news, it's the third trimester! Which means I/we need to buckle down and start working on the nursery! It seems like my subconscious was at work while creating this outfit because it has all the colors in my still-to-be-finalized "sophisticated girly" theme: neutrals, bright pink, navy, and gold. Lay Baby Lay is one of my favorite blogs of late and she shares the best nursery inspiration boards. Yesterday's mermaid-themed board has me thinking twice about the nursery.

Being 28 weeks along also means I have the pleasure of taking the glucose screening test this weekend to check for gestational diabetes. Fingers crossed that it goes well!

Have a fantastic weekend!


Pin It

Wednesday, March 6, 2013

Do you need life insurance?


This week marks the second annual Women's Money Week and today's topic is pretty appropriate now that we have a baby girl on the way: Family and Money. With our family about to grow this Spring, we knew it was time to buy life insurance policies. We already have small policies though work, but knew we should have more coverage. Before I delve into the different types of life insurance and how much to purchase, let's take a step back. How do you know if buying life insurance is the right decision for you?

Obviously everyone's financial situation is a little different, but in general, you should have life insurance once someone else is financially dependent on you. For most people, this is when you're starting (or thinking about starting) a family. Even if you're married with no kids, but have a mortgage or significant student loans, life insurance is probably a good idea to look into. Same goes for if you're single and a parent co-signed on a mortgage or student loan. If your parents would be burdened by paying off that debt, it might be a good idea to get a small life insurance policy.

Overall, life insurance gives you peace of mind that your loved ones will be taken care of financially in the event the unspeakable happens. You'll want life insurance to cover the costs of child care, schooling for your children (especially college), any outstanding debts (mortgage, student loans, consumer), regular living expenses (particularly if you and your spouse were depending on two incomes to cover these expenses), and funeral costs.

Since your expenses could differ from another couple's needs, I'll speak to how much coverage to buy later. Additionally, your age and the amount of money you have set aside for retirement and savings will also impact how much life insurance to purchase. Therefore, it's a good idea to reevaluate your financial situation and life insurance coverage every few years.

Any other burning questions about life insurance?
Pin It

Tuesday, March 5, 2013

Scallops and Wild Mushroom Risotto


Scallops are one of my favorite things to order at a restaurant. Mostly because haven't been able to figure out how to cook them properly. I remember some particularly delicious dinners: scallops ordered from the Scottish Arms in St. Louis on Valentine's Day with John; scallops served in their shells with truffles and asparagus at a restaurant in Paris with my Mom, sister, and aunt; and parmesan crusted scallops from Petterino's this past winter with my Mom and John.

Parisian scallops

But things might be changing because we finally figured out how to properly cook scallops this weekend! After attending a day-long childbirth class at the hospital, we swung by Whole Foods to pick up something for dinner. We didn't have any plans for the night, so making an epic dinner became our plan. John was taken in by the scallops' siren song and we resolved to master the art of cooking scallops that night.


We found Tyler Florence's recipe for risotto with scallops and wild mushrooms and never turned back. The recipe had all of my favorites: scallops, mushrooms, and a cheesy risotto.


Back home, we read up on cooking scallops, vowing to follow the instructions to a T. Turns out, we had it all wrong in the past. You need a hot pan to sear and carmelize the scallops. Plus, we were impatient while cooking them. Scallops need to be left alone in the pan until they're ready to flip. And once flipped, they can overcook pretty fast. Finally, scallops need room to cook. Crowding the scallops in the pan will cause them to steam instead of sear. Oops.


I'm happy to report that the scallops were a success! When my friend Kati asked for dinner recipes and tips on how to cook seafood last week, I didn't expect to share a recipe for scallops. Maybe I'll share the tilapia recipe we cooked last night next.

Scallops and Wild Mushroom Risotto
Adapted from Tyler Florence

Ingredients
Extra-virgin olive oil
1 yellow onion, minced
5 garlic cloves, minced
1 pound assorted mushrooms (Portobello, crimini, and shiitake), cleaned, stemmed, and rough chopped
Leaves from handful fresh thyme sprigs (or ~1 teaspoon dried thyme)
2 tablespoons chopped fresh flat-leaf parsley
2 bay leaves
Salt and freshly ground black pepper
2 cups Arborio rice
1/2 cup dry white wine, such as Pinot Grigio
8 cups chicken stock, heated
2 tablespoons butter
1/2 cup freshly grated parmesan cheese

Extra-virgin olive oil
1 1/2 pounds sea scallops (with the foot (crescent-shaped muscle) removed and discarded)
Salt and freshly ground black pepper

Fresh flat-leaf parsley, for garnish

Directions
Place a dutch oven (or other large, deep pan) over medium heat. Drizzle in a 2-count of olive oil. Add the onion and garlic and cook, stirring, for 5 minutes until soft. Toss in the chopped mushrooms, thyme, parsley, and bay leaves and cook until the mushrooms lose their liquid and are lightly browned, about 10 minutes. Season with salt and pepper. Add the rice and stir 2 minutes to coat with the oil; the grains will turn opaque. Season again with salt and pepper. Stir in the wine and cook 1 minute to cook off the alcohol.

Now pour in 1 cup of the warm stock and stir with a wooden spoon until the rice has absorbed all of the liquid. Add another cup of stock. Continue in this way, stirring constantly and adding the stock 1 cup at a time, allowing the rice to absorb the liquid before adding more. (You may not need all of the stock; the risotto is done when it is slightly firm but creamy.) Take it slow and steady, this could be 30 to 45 minutes.

When the risotto is almost done, it's time to prep and cook the scallops. Place a large pan over high heat and drizzle with a 2-count of oil. While the oil is heating, rinse the scallops and pat dry with a paper towel. Sprinkle with salt and pepper on both sides.

When the oil is hot (there may be a tiny bit of smoke), place the scallops in the pan. Give them room (we cooked 5 at a time). Cook for 2 minutes and don't touch them until the 2 minutes are up! After the 2 minutes, you can check to see if the scallops are carmelizing (getting brown). If so, flip them over. If not, give them another 30 seconds to 1 minute to cook. (Note: Cooking times will differ depending on the size/thickness of your scallops, pan temperatures, etc.)

Cook for 1 minute on the other side. Since the scallops will continue to cook after being removed from the pan, take them off when the centers are still slightly translucent (you can see by looking from the side). Another way to check for doneness is to press the top of the scallops with your thumb. If they're still springy, they're properly cooked. If they're firm or stiff, they're already overcooked.

At this point, the risotto should have absorbed the last of the chicken broth and be ready. Fold in the butter and cheese, and drizzle with a little more olive oil.

Dish some risotto on a plate and place 3 or 4 hot scallops on top. Garnish with parsley.


Pin It
Related Posts Plugin for WordPress, Blogger...