Showing posts with label garden. Show all posts

Tuesday, August 7, 2012

Garden Fresh Dinners

With all the action our patio has been getting lately, I thought I would show some love to the rest of our backyard. Mainly, the garden. And by garden, I mean the explosion of plants and produce. Exhibit A:


As you can tell, things are a bit wild and untamed. But don't you worry, we're putting our herbs and veggies to good use.


Cucumbers, tomatoes, oregano, and basil in cucumber salad


Basil in pesto pasta. We also like to make pesto pizza.


Tomatoes in BLT sandwiches


And tomatoes and basil in my all-time summer favorite: roasted tomato pasta. Which continues my strange relationship with tomatoes. As much as I question raw tomatoes, something magical happens when you roast tomatoes, onions, and garlic with a little olive oil, kosher salt, and pepper. The juices meld together and I can't get enough of it. I wanted to plant cherry tomatoes just to make this dish. I know...


This recipe isn't very scientific, so it's the perfect way to use up random veggies you might have hanging around. Just add a little of this and a little of that. Sometimes we only use tomatoes, garlic, and onions. Other times we add mushrooms or peppers. Last year, we added zucchini.

Roasted Tomato Pasta
Adapted from Smitten Kitchen's Roasted Tomatoes and Cipollini

Ingredients
1 pint of cherry tomatoes (or beefsteak tomatoes, roughly chopped)
Quarter onion (any color), sliced
Garlic, roughly chopped. As many cloves of garlic as you like ;)
Olive oil
Kosher salt
Pepper

Pasta

Fresh chopped basil
Parmesan cheese

Directions
Preheat oven to 375*.

Spread tomatoes, onion, and garlic in a 9x13 baking pan. It can be glass or metal.

Drizzle with olive oil and a few pinches of kosher salt and fresh cracked pepper. Toss the tomatoes, onion, and garlic until they are completely coated.

Roast in the oven for about 45 minutes. Turn the tomatoes with a spatula or wooden spoon every 15 or 20 minutes to make sure they cook evenly.

While the tomatoes, etc. are roasting, prep your spaghetti or pasta according to the package's instructions.

Once the pasta is cooked, pour it into a bowl. Then pour the entire pan of tomatoes, onions, and garlic over the pasta. Don't forget the juices, they're the best part!

Garnish with fresh chopped basil and Parmesan.

Note: If you made extra roasted tomatoes (smarty pants), they go perfectly in an omelet.


Pin It

Thursday, July 5, 2012

Mediterranean Quinoa


One of the things I love about the great US of A, beyond our independence, is the diversity. Not just the people; the diversity of flavors. America really is a melting pot. And if you've ever been to an international grocery store, you know what I mean.

When the founding fathers signed the Declaration of Independence, do you think they could imagine the multitude of cuisines present here today? Obviously Ben Franklin and John Adams spent time in Paris, but what about food from the farflung lands in South America, Asia, and Africa? Or even the regional flavors that evolved over time?


I'm thankful that I was exposed to all sorts of cuisines growing up: Italian, Greek, Polish, Mexican, Chinese, and so on. I was never really a picky eater and loooove spicy foods. It was way more than bland meat and potatoes. Sometimes John wonders where my palate come from.

So when I can't hop on a plane during the middle of the week, at least my tastebuds can go on a culinary adventure.


Mediterranean Quinoa

Ingredients
1 cup quinoa
2 cups water or chicken broth
2 tablespoons lemon juice
1 14 oz. can of quartered artichoke hearts, drained
1 cucumber, diced
1/2 pint cherry tomatoes, halved or quartered
1/2 cup kalamata olives, drained
2 tablespoons pinenuts (toasted)
4 oz. container of feta cheese
Handful of basil (rough chopped or cut into a chiffonade)
Salt and pepper to taste

Directions
Pour quinoa into a strainer and rinse.

In a medium pot, bring broth or water to boil. Stir in quinoa. Cover and reduce heat to low, simmering about 15 minutes, until quinoa expands and absorbs all liquid.

While the quinoa is simmering, prep the rest of the ingredients.
Once the quinoa has absorbed the water or chicken broth, pour in the lemon juice and fluff quinoa with a fork.

Stir in the remaining ingredients.

Garnish with additional feta cheese and basil.

May be served hot or chilled. Makes 4 to 6 servings.

Pin It

Thursday, June 21, 2012

Prepping for our Patio

Last week, Marie asked when we were going to Europe in response to my announcement that we finally got cable. I'm assuming that's because we could have skipped the cable and used the money for plane tickets. Unfortunately, that's not the case. At least not this year.

Logistically speaking, a long week or so of travel doesn't fit into our schedule. John is using a good chunk of vacation time to go to Appalachia with our church. Plus, we'll be going to Denver for a wedding this fall and are planning on spending some extra days there.

Finally, our "big win" savings are being put towards a brick patio! As you may recall, we had a giant hedge in our backyard. Exhibit A to refresh your memory:


When my parents visited last fall, we made the executive decision to rip out the hedge in the hopes of adding a patio. Turns out, the hedge was three plants and had some super-thick trunks and roots. Exhibit B of John with a fraction of hedge remnants:


Now that it's summer, we're itching to get this brick patio started! At one point, we considered installing the patio ourselves. That is, until we saw the yard sloping towards our house. Clearly, that's not good if it rains, so we called a few patio and landscaping companies for quotes.


We decided on the company and we finalized the design a few weeks ago. And yes, we borrowed the neighbors furniture for illustrative purposes.


We'll have a curved path connecting the driveway with the patio, keeping space for the rosebush and some grass to the left of the path. The day lilies will be moved since they were only planted there until we found a more permanent spot for them.


The left side of the patio will be the eating area with a table that fits 6 or so people. On the right will be a conversation area with chairs and a small table. Yes, Dad, we'll conceal the air conditioner with some plants.

Underneath the window will be a raised, walled planting area. In addition to planting space, this will also give us more seating. We don't plan on putting the grill on the patio since there's plenty of space to put it on the driveway when we use it and roll it back in the garage when we're not.

We're currently waiting on the building permit (we applied for it last Friday), so once we have it, we'll start breaking ground!

Are you completing any big projects this summer?
Pin It

Monday, June 18, 2012

The Garden of Eatin'


While I miss certain things about living in the city (walking everywhere! easy public transportation!), there are a few things about having a home that I love. One of the big ones is having a large herb and vegetable garden.


Last year's garden was a huge success, especially the zucchini! But we also had a few duds: the tomatoes took forever to ripen and we never enjoyed a pepper.

This year, we decided to try a few new things. And considered our neighbor's thought process of growing vegetables that are more expensive to buy in the store. Case in point, tomatoes. Those babies can be $1-2/lb for basic beefsteak, let alone buying cherry, organic, or heirloom varieties. On the other hand, the grocery store practically gives away zucchini.


Our little "farm" is currently growing beefsteak and cherry tomatoes, cucumbers, and a few rogue spaghetti squash that snuck into our compost. We also planted a boatload of basil and sage. And of course I can't forget the dill, mint, and chives shared by our parents' gardens and the crazy oregano from last year's garden. The hops are also taking off!


And since I like numbers, here's a cost breakdown comparing what we purchased at Home Depot (or was shared) vs. the local grocery store:


Based on the mojitos we enjoyed last weekend and the pesto on the menu for this week, I don't think we'll have a problem breaking even. Obviously there's the opportunity cost and convenience of buying veggies from the grocery store, but I enjoy tackling the weeds on the weekends. Even if that means itchy eyes during the work week. And you can't beat the fresh taste!


And just for fun, here are a few other shots of our roses.

Do you have a garden? Maybe one on your patio?

PS - John wants to make sure he gets credit for the title. You're welcome, Hubs.
Pin It

Thursday, March 29, 2012

Fun Things for Friday

Hurray for Friday! My brain is looking for a break, especially after writing that epic post about blogging and taxes, so how about a little recap of what's new, what I'm loving, etc?

Budgets are Sexy shirt, navy Toms, Loft striped sweater jacket, Gap jeans

First up is something that's at the top of my birthday list. So what if my birthday isn't until May 1. It gives you plenty of time to talk amongst yourselves and figure out who will get me a Budgets are Sexy's t-shirt. I'm thinking a ladies size medium in white. Or maybe pink. I'm sure you'll all figure it out. And yes, I will proudly wear this shirt as it's the epitome of fiscally chic :)


It's one of the last Fridays in Lent and this discovery couldn't come any sooner. We're loving Trader Joe's chicken-less tenders! They really do taste like chicken. And the mandarin "chicken" nuggets were perfect with stir fry veggies. Bonus points go to the dark chocolate almonds with sea salt and turbinado sugar.


Remember how I was all excited that our rose plants were starting to sprout? Well, spring is definitely here! Look how big they're getting! And our oregano plant somehow managed to survive the winter, which means we've already added fresh oregano to pizza and salads.


Meet the latest addition to our homebrewing arsenal...fresh hops! We planted Cascade and Chinook hop vines and they've already started to pop up. Growing hops seems to be the cool thing to do these days as one of our favorite STL breweries, Urban Chestnut, also planted a mini hop farm this spring.


Last, but certainly not least, one of my pillow covers was on Etsy's front page on Tuesday! There was some major "happy dance" action in my cubical that day :) And don't forget you can get 10% off through 3/31/12 using coupon code LUCKY10.

What are you up to this weekend? Anything big going on? We're going to see a school musical with friends on Saturday.


Pin It

Friday, July 22, 2011

Basil Beauty


Kemp and Co shirt dress, Toms sunglasses, Urban Outfitters cuff,
Toms wedges, Green Goddess earrings from One Sydney Road

It seems to be a gardening and herb themed week, so why not make my Friday’s Fancies post related to herbs and gardening? How about a stylish, yet impractical gardening outfit? Nah. What about a outfit to wear to a picnic that matches the freshness of the herbs in the dishes to be served? Yes, that's more like it.

And as promsed, here are some tips for growing crazy, big basil.

Since my Dad is my gardening expert, I’ll share his straight-forward tip first: Make sure you water your herbs and vegetables! We try to water our plants daily, especially when the temperature is in the 80's and 90’s. It’s better to water your plants in the morning or in the evening so there’s less of a chance that the water will evaporate before getting to the plants’ roots. Don't drench them, just give them a good soak.

Dad also suggests using Miracle Grow plant food once a week. We haven’t been doing that consistently, just when we remember.


I think the biggest tip for growing bushy basil, as opposed to tall and gangly basil, is picking it properly and often. As you can see in the picture, basil has one central stalk, and then branches out into intermediate stalks. Instead of picking individual leaves, just snip off the entire portion of the plant right above where new shoots are growing. Those small shoots will grow and multiply into bigger stalks.

Now, onto our chiffonade tutorial. I learned how to chiffonade by watching the Food Network. Probably Giada de Laurentiis if we’re getting specific. With some quick knife work, you can make your basil look very pretty.


First, stack the basil leaves. I like to have the largest leaf on the outside since you’ll be rolling everything up.


Now, roll the leaves up like a basil cigar.


Roll it tightly!


While holding the basil bundle, start to make perpendicular slices. Make the slices as thin or thick as you like.


Once you’ve sliced the whole bundle, fluff and untangle the basil.

Now you have pretty ribbons of basil to garnish pasta, use in bruschetta, or add to Cucumber Salad! This technique also works well for mint or other flat leaf herbs.

What are you doing this weekend? I'll probably be playing in the garden and our couches are scheduled to be delivered!


Pin It

Tuesday, July 19, 2011

Seeds of Wisdom from Dad

Rhode Island hydrangeas

Hi, friends! How was the weekend? The wedding was absolutely beautiful and it's tough getting back to reality. I wouldn't mind spending a week longer in Rhode Island to enjoy the beaches, history, and amazing food. One of the beautiful things about Rhode Island is the abundance of hydrangea bushes. They were everywhere! I considered bringing some back in my carry-on, but they didn't quite fit :)

While we're on the topic of plants, I thought I would share some thoughts and advice from my Dad:
For those settling into their first house, one way to spruce up the yard/garden, is to ask family/friends/neighbors to share some of their (and your) favorite plants.  Most gardens and perennial plantings need to be split periodically, and rather than toss them out, they can find a good home elsewhere. 
OR (and we'll be doing some soon), when renovating a garden or planting area, sometimes specimens just don't fit or work anymore.  Why not give them to someone else that can use them?  Don't encourage taking every piece of junk or castoff or orphan plant.  If it doesn't fit in your yard, then don't bother.  But for those that are starting with nothing (someone we know), something is better than nothing.  If it doesn't work out, you didn't invest anything in it other than some time, care, and water.
Thanks for the tips, Dad! We definitely appreciate the rose bushes and transplanting/splitting help from a month ago. How about a status update on the rest of the plants?

"before" from May, "after" from June

Current "after" in July

Everything seems to be doing well, except for the peppers and oregano. No peppers yet and the oregano isn't very big. On the other hand, the watermelon is about to take over everything! The basil is getting bushy since we've used it for pesto, salads, and sandwiches. And of course the zucchini plants are giant! We even have some pretty good sized zucchini. One tomato is ready to go, and hopefully more are on the way.

I can't wait for juicy watermelon and zucchini bread and cake!

How's your garden doing? Have you been able to enjoy anything from it yet?
Pin It

Thursday, June 16, 2011

The Reel Deal

Great news! The rose bush seems to be springing back to life! It rained for most of yesterday, which seemed to help the bush. When we got home from work, a bunch of new flowers were about to start blooming....yay!

While we're on the topic of yardwork and gardening, I thought I would get "reel" about our lawn mower. This was mostly John's decision since he has the most mowing experience and will be cutting our grass 99.9% of the time. Since our lot is less than a quarter acre (and we have the world's largest hedge), John wanted to buy a reel (manual) push lawn mower. No self-propelled or riding mower for us. Other reasons for purchasing a reel mower include:
  • Environmentally friendly - no gas fumes spewing on us or into the environment
  • Easy to maintain - the blades will only have to be sharpened every so often
  • Less expensive - won't have to spend $4+ per gallon for gas, oil, parts, or maintenance
  • Quiet - John can mow the lawn at any time since there isn't a loud motor
  • Good form of excersize - it's not very hard to push, but you do need to walk briskly to keep up the momentum

After copious amounts of research, he settled on the Scotts 20 in. Classic Reel Mower with a clippings catcher ($139). When we went to Home Depot, they were all out of the 20 in. model. The sales associate said they had been selling like hotcakes. Particularly to people in their 20's and 30's. Who knew we were so hip?

Therefore, we settled for the Scotts 18 in. Supreme Reel Mower ($109). The reviews said the grass catcher was a little annoying, so we're OK that we didn't get it. Plus, we can easily mulch the grass with the clippings.


The mower was pretty easy to assemble and John didn't need to use any tools. As you can see below, there aren't very many parts.


John is 6' 2" and the mower is a good height for him. I pushed it around the other day and the height of the handle works for me too.


Since John has used the mower for about a month, I think he can give a pretty good assessment of the mower:
  • First, it's definitely important to note that we don't have a very large lawn. It only takes John about a half hour to cut the lawn, so a reel mower is definitely a good fit for us. If you have a larger lawn, you better be ready for a good workout.
  • While you can adjust the height of the blades, the mower doesn't do very well with super tall grass or weeds. He waited about two weeks to cut the grass once and dandilions sprung up between then. The mower just pushed over the weeds, so he had to go back and pick them by hand. Or he has to mow over the area multiple times.
  • The reel mower doesn't do well with twigs at all, so you have to pick them up before mowing. If you don't, the blades will jam.
  • The mower can be a little hard to maneuver around corners, but it's easy to push.

Overall, we're totally happy with the decision to buy a reel mower! We definitely recommend it to anyone in the market for a new lawn mower.

Anyone else keepin' it real with a reel mower?

(We weren't compensated to review the lawn mower. We bought it with our own pennies and the opinions are ours.)
Pin It

Tuesday, June 14, 2011

Watching Our Garden Grow

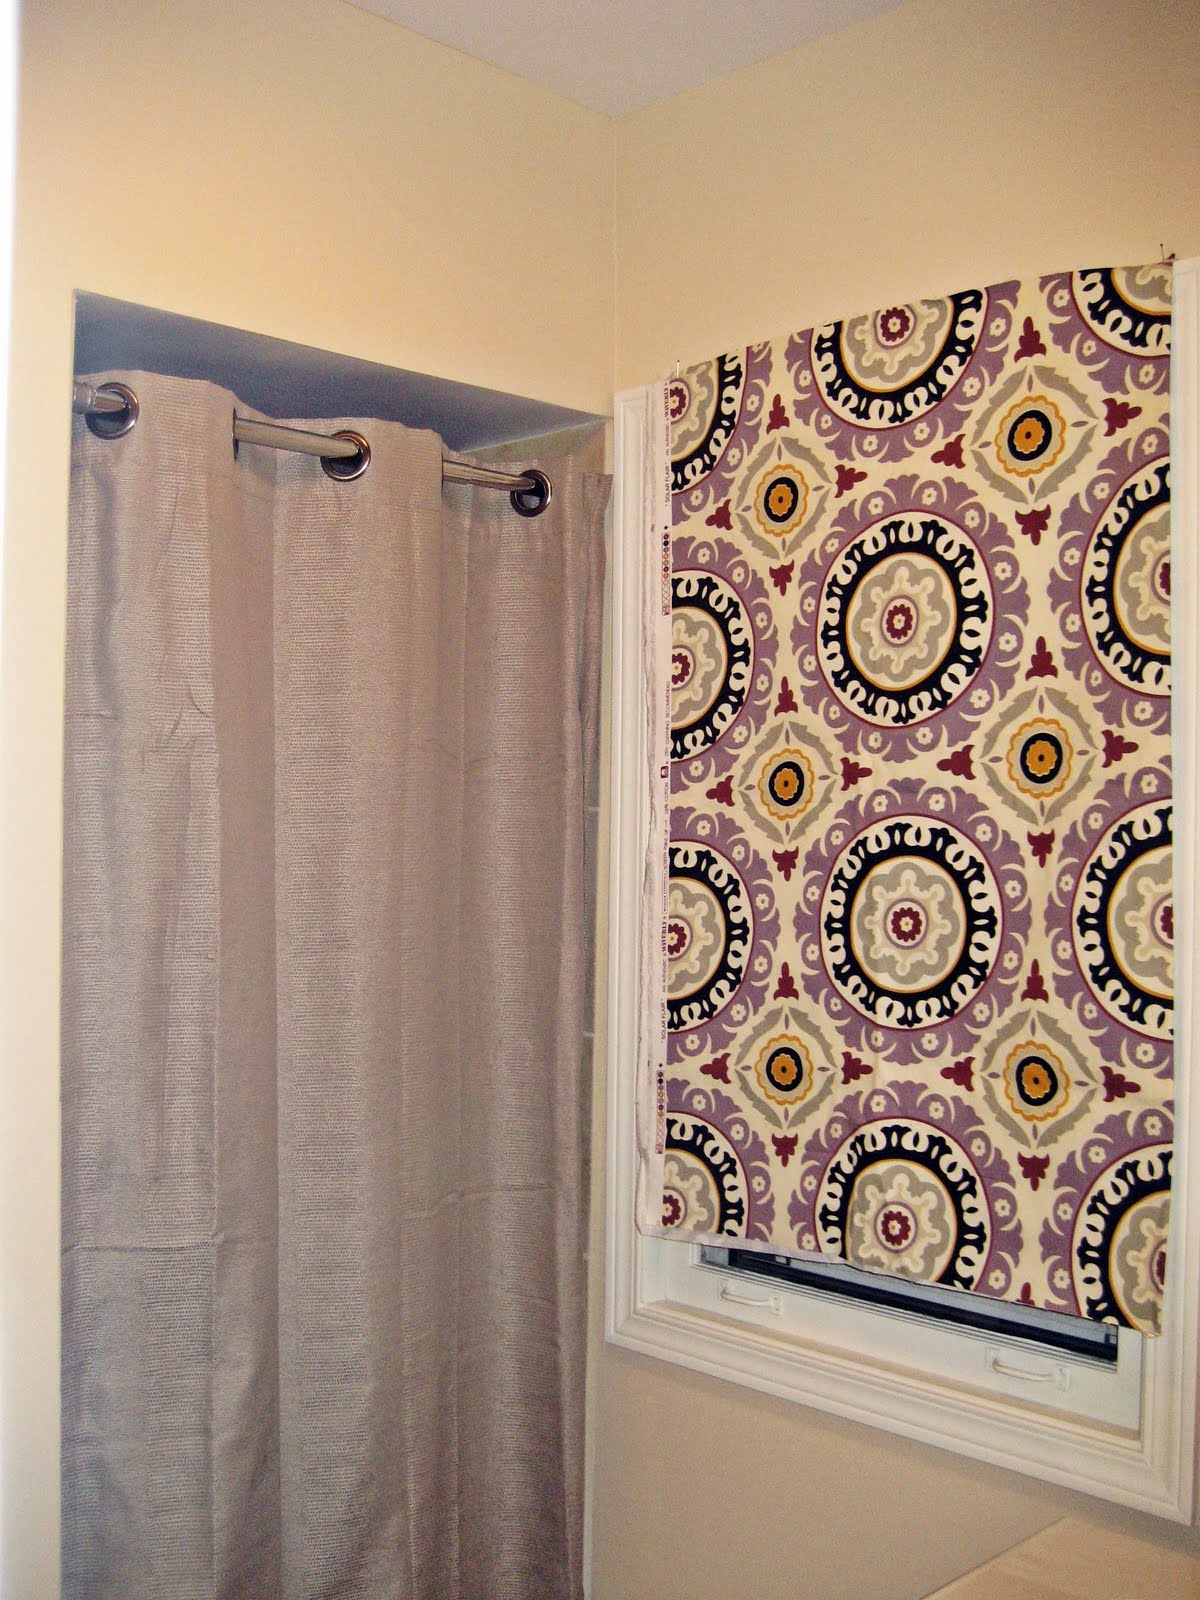
How was your weekend? No major updates on the bathroom yet. I bought a curtain panel from Target and the to-be-hacked roller blind from Home Depot, but stopped there. Most of our efforts were concentrated on the outside instead of primping the bathroom. If you're really curious, here's how the bathroom looks with the new shower curtain:


So back to the yard. It looks a million times better thanks to the help of my parents! My Dad loves working in the yard, so I like to think we gave him an early Father's Day present for "letting" him help. Here he is transplanting a hosta from the back of the house to the front. He also moved the salvia plants over to make room for the hosta.


Before Pictures

Before I show you the rest of the fruits of our labor, how about some "before" shots? These were taken in April during the final walkthrough.


Not too much going on in the front, except for John. The small evergreen on the left is still close to that size. The tree in the middle has filled out a little and the burning bush on the right has completely exploded with greenery! There are also some salvia, black-eyed susan, and other plants that have since sprouted.


Beginnings of the hosta that eventually found its way to the front. 


We are also proud owners of the world's largest hedge. Well, maybe not, but it's definitely too big for the house. We're considering different options for this area and they all include cutting down the hedge. We might add some different bushes, like hydrangea. Or maybe we'll lay some brick for a patio area. Regardless, it will probably be a next summer project.


The backyard also has a berm, which is a raised flower bed. (Not a burial ground.) Don't worry, the weeds were evicted Memorial Day weekend. The purple flowers are Walker's Low Catmint. Just wait for the "after" pictures of the berm!

After Pictures - Front


Let's start with the front of the house again. To the right of the front door is this area. I can't remember the name of the plant in the back. They have some small pink flowers. In the middle are black-eyed susans. See how there are two larger plants on the outside of the picture and two smaller ones in the middle? The black-eyes susans were spreading towards the grass so my Dad split them in the front and transplanted them in the middle. The small pink flowers in the front are impatiens.


The area to the left is still a work in process. The bright green plant is the hosta and the purple plants on each side are salvia, which already grew in the bed. We My Dad planted some begonias down in front. Here's a little close-up:


After Pictures - Back


The biggest difference is obviously in the berm! The weeds are (mostly) gone and the catmint has been moved to the back of the mound. On the top are all sorts of herbs and veggies. Since this is our first real garden, we went all out: basil, Greek oregano, sage, tomatoes, red and green peppers, zucchini, and watermelon. Most of the plants were less than $2 each (sometimes for a little 4-pack), so we won't go broke if a few croak.


We also added some pops of color in the back with these hanging flower baskets.


One of the main purposes of the trip was to bring some rose plants from my parents' yard. My Dad planted them shortly after they arrived on Saturday and I think they're still in transplant shock. The weather has been slightly cooler and we've made a point to water them daily. We even watered with rose food on Saturday. Hopefully we'll have a successful "after" picture soon!


This pink rose bush replaced the hosta plant that was moved to the front.


Here is the climbing rose with some extra begonias.

Since we're pretty new at gardening, it's exciting to watch everything grow. Hopefully in a few months we'll have some fresh-picked veggies from our garden! How about them savings?!

Are you growing a vegetable or herb garden? Have any gardening tips to share? If your thumb isn't so green, what are your favorite fruits or vegetables to enjoy in the summer?

And a big "thank you" again to my parents for their help!

Pin It
Related Posts Plugin for WordPress, Blogger...